
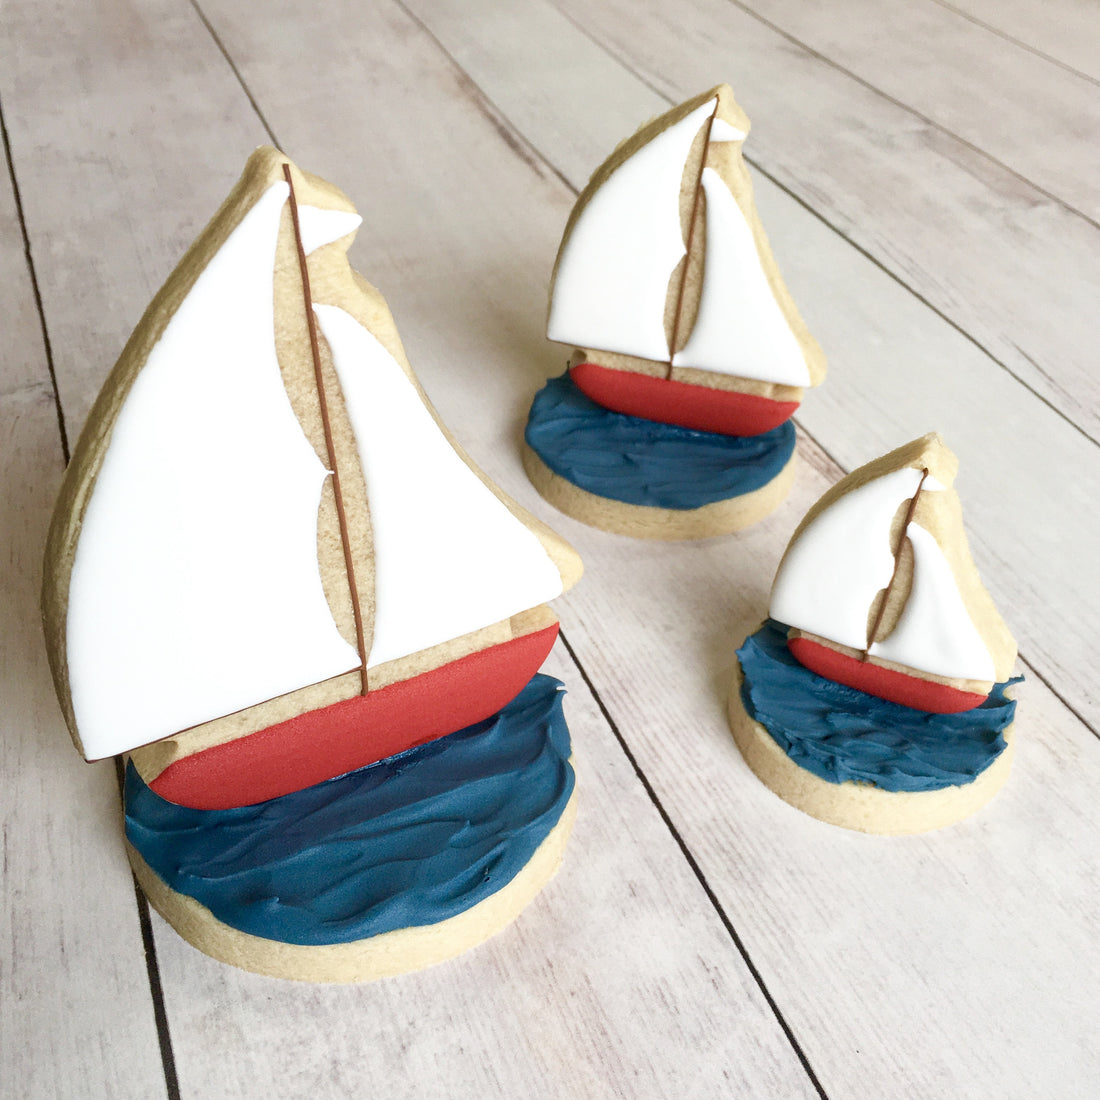

These sailboats sailing on blue waves have us hoping to get to the beach as soon as possible. Jenessa of Dolce Cakes & Confections shows us how to make incredible 3D cookies that really POP!
*
Sooo, when it comes to baby showers, the "Ahoy, it's a boy" theme seems to be extremely popular. When a friend of mine asked me to make some cookies for a shower and I wanted to do something different than the standard anchors and whales. After perusing the Internet looking for inspiration and seeing the same stuff over and over, I came across the cutest 3D sailboat cookies and just had to recreate them.
I don't remember who the original creator of these adorable cookies was, but if anyone knows, please go and praise them for his or her work. I always like to give credit to those who deserve it.
What you'll need:
- Roll out cookie dough
- CookieCutterKingdom Sail Boat Cookie Cutters
- CookieCutterKingdom Circle Cookie Cutters
- Royal or dark blue royal icing - toothpaste consistency
- White royal icing - piping and flooding consistency
- Brown royal icing - thick piping consistency
- Toothpicks (I didn't need them, but you may)
Optional:
- Blue gel paste color
- Clear alcohol (like Vodka) or extract
- Luster dust
- Offset Spatula
Directions:
First things first, you'll want to roll out, cut, and bake off your cookies. Make sure to cut out a circle for each boat you make. I used all three sizes of CookieCutterKingdom Sail Boat cutters for dimension and matched the bottoms up with similar sized circle cutters.If you're making small cookies, CookieCutterKingdom Circle Multi-Cookie Cutter is perfect because you can knock out cutting out 4 cookies at a time (it only comes in 1.75")! After all, time is money when you have 3 kids, 3 dogs, a husband and a business.

Once your cookies are cooled, set the circles aside and start on the boats. Take the red royal icing and fill in the hull (bottom section).

Use the thick brown royal icing to pipe a straight line from the hull to the tallest point and then a horizontal line from the mast to the left widest point creating the boom....(and just so you guys know, I had no idea what most of these terms were until I googled "parts of a sail boat"). I like to etch in a line with my scribe tool and pipe the line horizontally to help keep the lines straight.


Depending on your comfort level, you can move from one section to the next without letting each color fully dry or you can let each section set before moving on. Your choice. Pipe arched triangles to make the sails. Set the boats aside to dry.

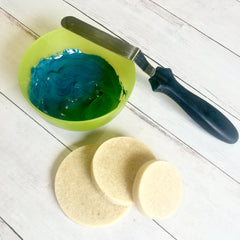
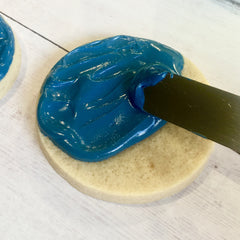
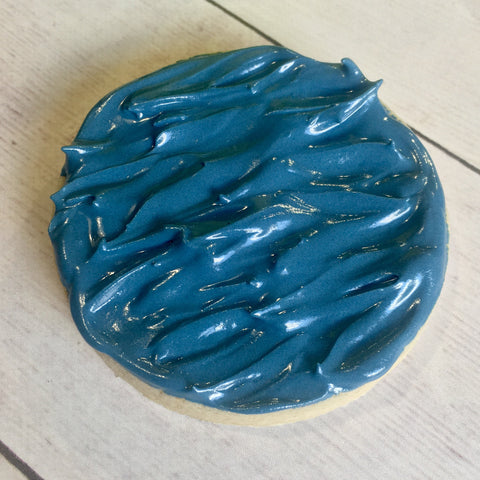
In the meantime, color the blue royal icing by adding one drop of color at a time and don't worry about mixing the color completely through. Take an offset spatula and smear the blue icing onto the circle cookies. The consistency should be similar to peanut butter. Once covered, use small zig zag motions to create wave like textures. Set aside and dry completely.
To assemble, pipe a thick line of blue icing in the center of the circle cookies and stand the sail boat in it. Press down firmly, but not too hard because you obviously don't want to break either cookie. Don't worry if the blue seeps out from beneath the hull. Take your offset spatula and gently spread it out and it will just look like the boat is cutting through waves in the sea.


If you need to, use a toothpick to prop the boat up in the back until the icing hardens.
Also, if you're feeling like being an over achiever, you can mix some blue gel color, luster dust and clear alcohol together and paint some of the high and low points of the blue to add dimension and enhance the look of the waves.
Next time you're looking to create something a little different, why not try a cute 3D cookie? Pair your cookie design with a circle (or plaque!) stand and decorate to your heart's content!
Happy baking!
Jenessa
Dolce Cakes & Confections