

We're well into the middle of summer and we've all probably seen a ton of ice cream cookies by now. Well...I love ice cream so I'm going to show you another one, but this time with a little texture and a lot of crunch!
If you'd like to add another ice cream variation to your decorating list, keep on reading because I think you'll really like this one.
Dust work surface with flour, roll out your dough, and dip cutters in flour before cutting out the french fries. Freeze shapes for about an hour, then bake according to recipe, and cool completely.


To start, take a small amount of thick white royal icing and smear a thin layer on the top, round section. Try to keep the icing away from the edges. 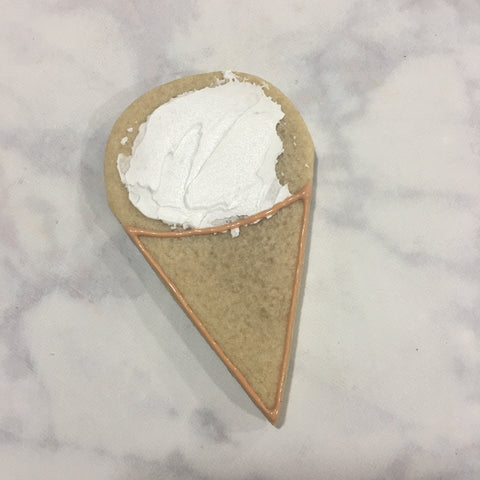
Next, outline and flood the lower triangle to form a cone shape with the light brown royal icing. Set the cookies aside for 20-30 minutes so a crust can form on the top of the icing.
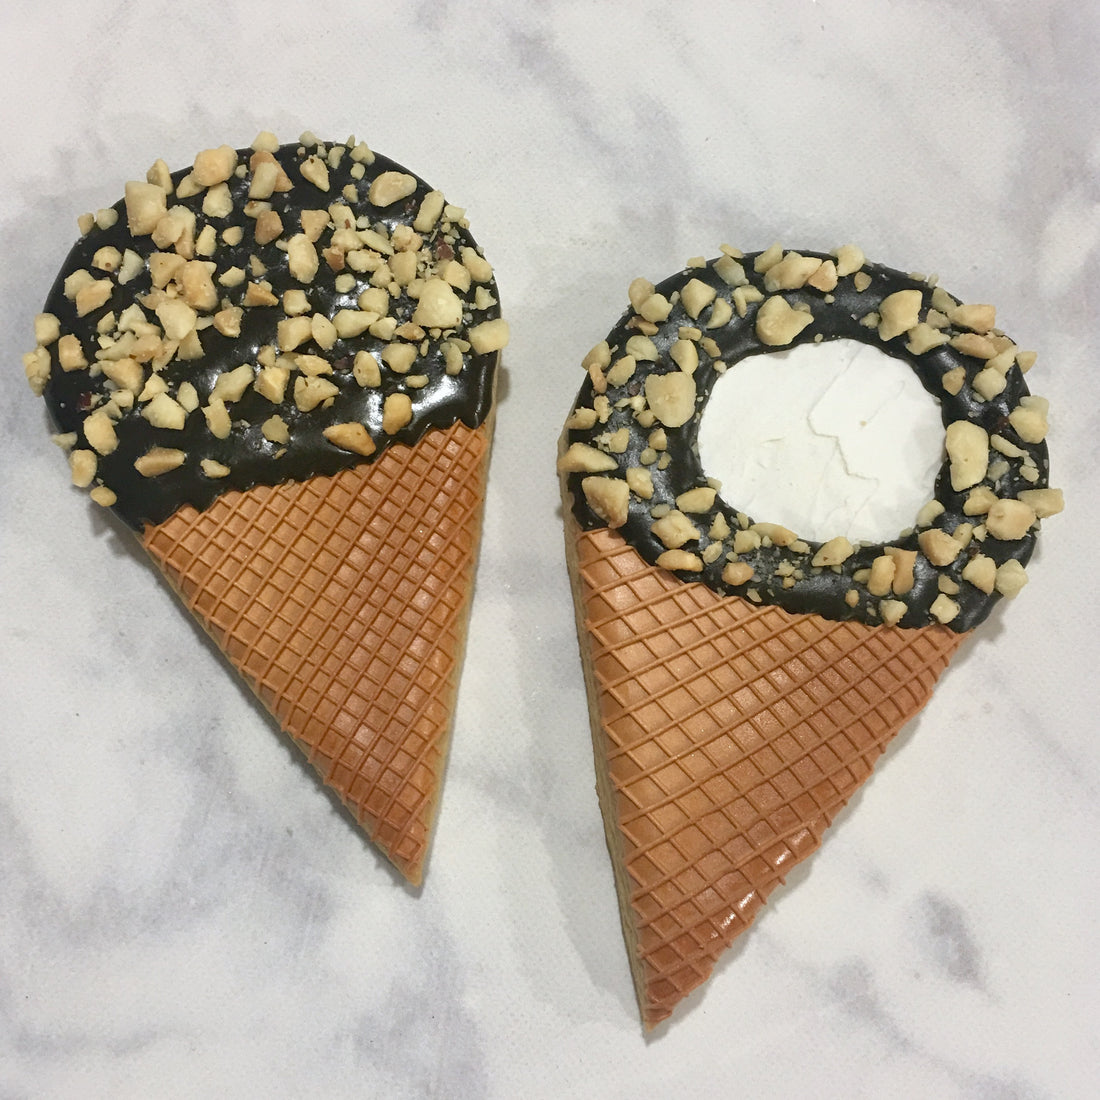
Then use the thick, light brown royal icing and pipe thin diagonal lines across the cone. I use tipless bags and snip a tiny bit off, but you can use whatever you have. I find the finer lines are more aesthetically pleasing.
This next part is optional, but I really think it adds to the final look! Using some ivory airbrush color, spray one side of the cone to add some shading. Make sure to cover the white section with a paper towel or something so you don't get overspray on it. I totally forgot to do this and had to make another cookie for this tutorial (oops)...but don't worry, we will fix that cookie later.
Now, take the dark brown icing and pipe a circle in the white section and flood to the outer edge of the rounded area. The circle doesn't have to be perfect. It will actually look better if it's misshapen because it will look more like a bite. Also, I added a drop of black into my icing to create that deep, rich color instead of overloading my royal icing with brown gel color.

Let the icing sit for 10-15 seconds then sprinkle on your crushed peanuts. If you apply them immediately after you flood, the peanuts sink down into the icing, rather than sitting on top.
Oh yeah, remember that cookie I messed up earlier with the overspray?! Well, I ended up filling the whole top in with the brown-black icing and added the crushed peanuts so it looked like a cone that hadn't been bitten into yet. 
Enjoy!
Xx,
Jenessa
Dolce Cakes & Confections
For an easy, no mess option for cookie decorating, try Tipless Piping Bags. Simply cut the tip size you want and discard the bag when you're done. No need for clean up!